
Categories
Categories are the foundation of your product organization. They help customers navigate the e-shop and improve search. This guide will show you how to create and manage categories.
Path: Admin > Products > Categories
Category Table
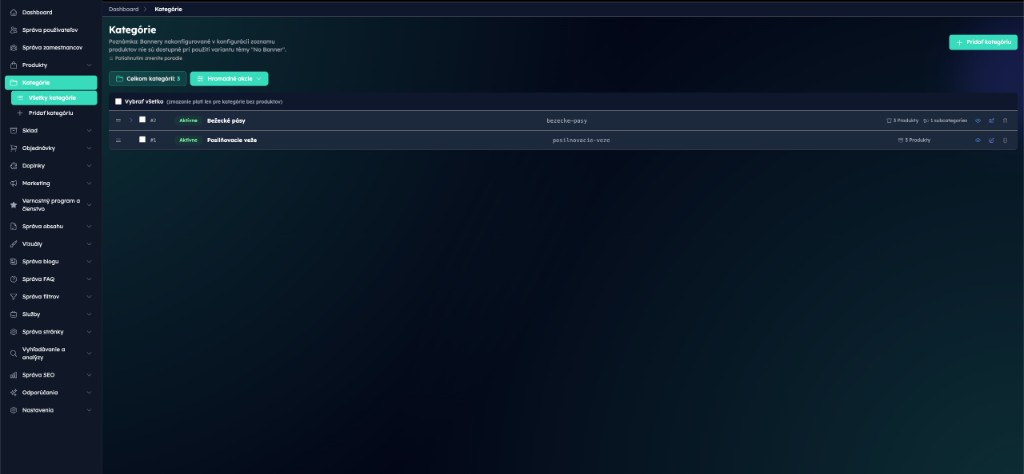
In the Admin > Products > Categories section, you can see a table of all categories:
Columns
- ID — unique category identifier
- Status — whether the category is active or inactive
- Name — category name
- Slug — URL identifier of the category
- Product count — how many products are in this category
- Subcategory count — how many subcategories this category has
- Expand — button to display subcategories
Category Order
You can reorder categories using drag-and-drop. Click on a category, drag it to a new position, and release. The order is saved automatically.
Creating a New Category
Path: Admin > Products > Add Category
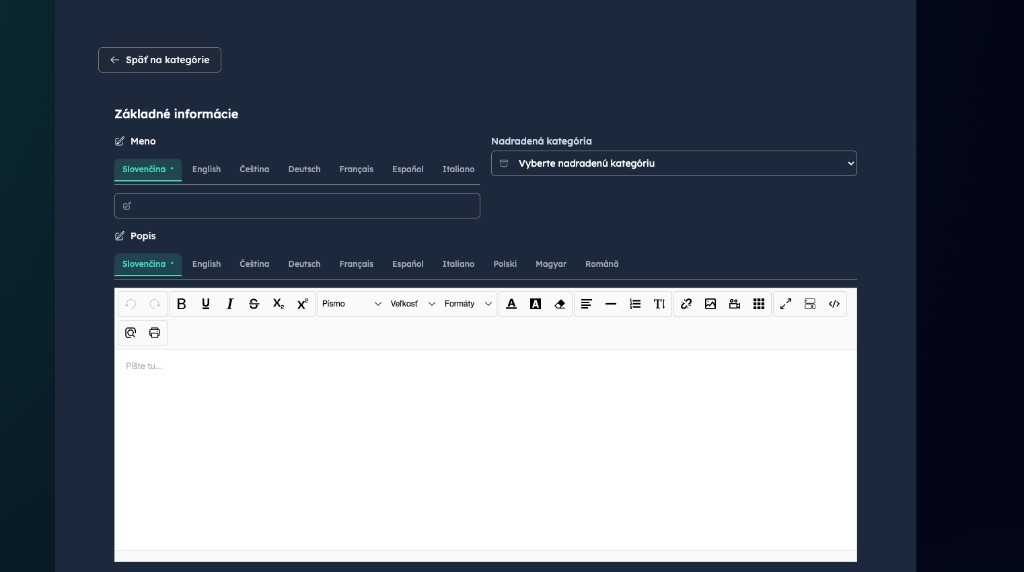
Category Name
The category name. Examples:
- Clothing
- Footwear
- Electronics
- Household
This field is required and will be displayed in the e-shop navigation.
Slug
The URL identifier of the category (e.g. "clothing" or "home-electronics"). When the category is created, the system generates the slug automatically from the name. You can change it later when editing the category — the slug must not contain uppercase letters or spaces, and the Generate button lets you regenerate it from the name.
Parent Category
If you want to create a subcategory, select a parent category. For example:
- Parent: Clothing
- Subcategory: Men, Women, Kids
If the category is top-level, leave this field empty.
Category Description
A detailed category description with formatting options. This text may be displayed on the category page. Suitable content includes:
- A brief explanation of what the category contains
- Benefits of products in this category
- Shopping tips
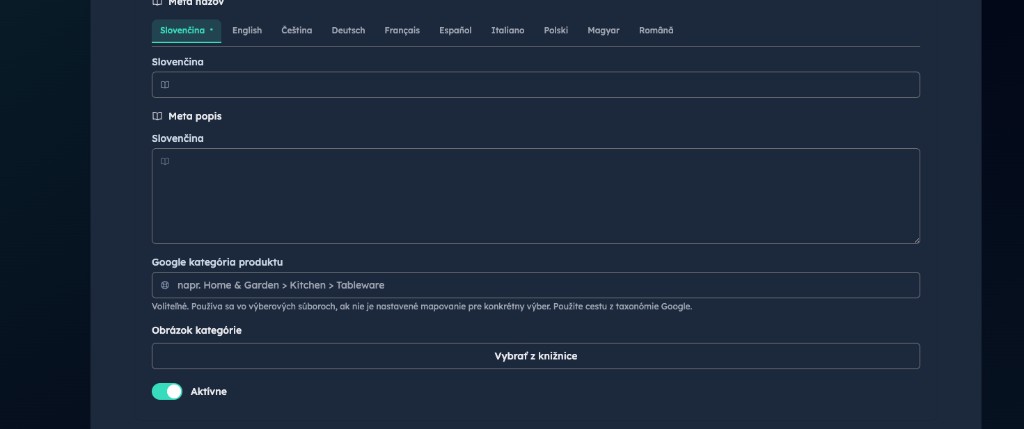
Meta Title (SEO)
The category title for search engines (maximum 60 characters). Example:
- Given name: Clothing
- Meta title: Quality Clothing Online | Merzio
Meta Description (SEO)
The category description for search engines (maximum 160 characters). Example:
- Shop quality clothing for the whole family with fast delivery. A wide selection of brands and styles at Merzio.
Google Category
Select which Google category your category belongs to. This information is used for integration with Google Merchants.
Category Image
Upload a category image that will be displayed as a thumbnail. The image should be:
- Properly proportioned (square)
- High quality (at least 500x500 px)
- Representative of the category
Editing a Category
Path: Admin > Products > Categories > [Click on a category]
After clicking on a category, a form with its details opens. You can change all fields except the ID. After making changes, click Update.
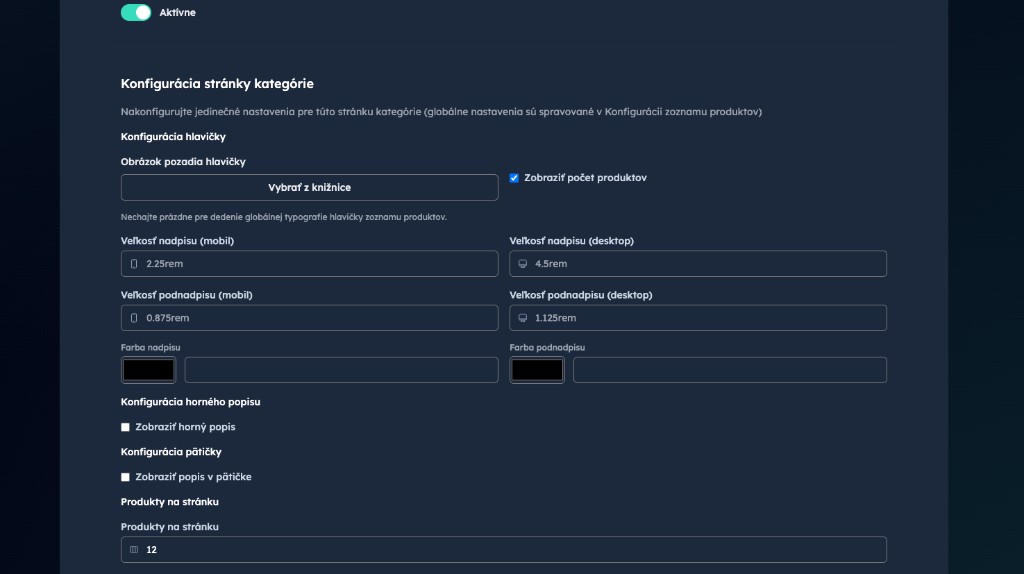
Category Page Configuration
Each category has its own page on the e-shop. You can configure it:
Header Configuration
- Header background image — image behind the category heading
- Show product count — toggles the product counter in the header
- Font sizes — heading and subheading size, separately for mobile and desktop
- Colors — heading and subheading color
Top Description and Footer
- Top description — optional text (with a heading) above the product list, with the option to truncate it to a chosen number of characters
- Footer description — optional text (with a heading) below the product list, also with the truncation option
Product Configuration
- Products per page — how many products are displayed on one page
Sidebar
- Sidebar type — Static (always visible) or Collapsible (toggle button)
- Open by default — whether the sidebar is open when the page loads
Quick Category Menu
- Enable quick category menu — a shortcut subcategory menu on the category page
- Max. number of categories, position and colors — fine-tuning of the quick menu appearance
Mobile Display Configuration
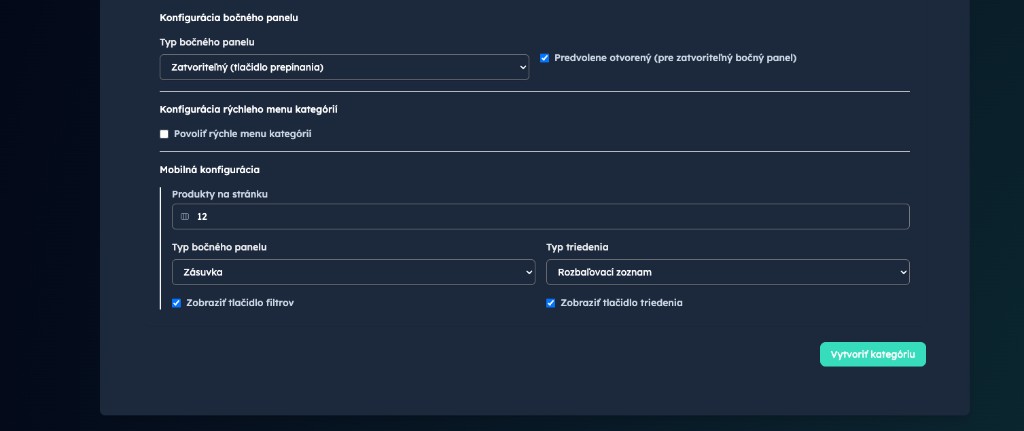
- Mobile products per page — number of products per page on mobile
- Mobile sidebar type — how the sidebar is displayed on mobile
Subcategories
Subcategories are second-level and deeper categories. The hierarchy looks like this:
Clothing (Main category)
├── Men (Subcategory)
│   ├── T-shirts (2nd level subcategory)
│   └── Pants (2nd level subcategory)
├── Women (Subcategory)
│   ├── T-shirts (2nd level subcategory)
│   └── Pants (2nd level subcategory)
└── Kids (Subcategory)
    └── Clothing (2nd level subcategory)
When creating a subcategory, select the higher-level category in the Parent Category field.
Displaying Subcategories
In the category table, next to each category you can see an Expand button. After clicking, all subcategories of this category are displayed. You can also:
- Reorder them with drag-and-drop
- Edit or delete them
Activating and Deactivating Categories
In the Status column, you can see whether a category is active (green) or inactive (gray). Click on the status to activate/deactivate the category.
- Active category — visible in the e-shop navigation
- Inactive category — hidden from customers but still visible in the administration
Deleting a Category
When editing a category, you can find the Delete button. After clicking, the category is deleted.
WARNING
If the category contains products, you must first move them to another category before you can delete it.
Tips and Tricks
Logical Structure
Create a logical category structure that makes sense for customers. Example:
- Clothing > Men > T-shirts
- Clothing > Women > Dresses
- Electronics > Computers > Laptops
TIP
A maximum of 3 category levels is usually sufficient.
Naming
Use clear and simple category names:
- Good: Men's T-shirts, Women's Handbags
- Bad: Tshirts_01, Bags_men_summertogether
SEO Optimization
For better search visibility, create:
- A unique and descriptive Meta Title and Meta Description
- Keywords relevant to the category
Images
Upload a quality image for each category. This helps customers navigate the e-shop more easily.
Minimum Number of Categories
Try to have at least 5-10 products in each category. An overly fragmented category worsens search experience.
Workflow: How to Set Up Categories
Step 1: Plan the Structure
First, write down how you want your categories to be organized. Example:
- Clothing
- Men
- Women
- Kids
- Electronics
- Computers
- Accessories
Step 2: Create Main Categories
Create all top-level categories (Clothing, Electronics, etc.).
Step 3: Create Subcategories
Create subcategories with the selected parent category.
Step 4: Configure Category Pages
For each category, set up the appearance (colors, typography, number of products).
Step 5: Assign Products
When creating or editing a product, assign the correct primary category to it.
More Information
- How to assign products to categories: Creating Products
- How to manage brands and labels: Labels, Brands and Tags